Graphical User Interface (GUI) - Java Swing: Diferență între versiuni
| (Nu s-au afișat 5 versiuni intermediare efectuate de un alt utilizator) | |||
| Linia 40: | Linia 40: | ||
O altă serie de clase necesară pentru implementarea unei interfețe grafice este setul de clase care extind interfața [http://docs.oracle.com/javase/7/docs/api/java/awt/LayoutManager.html java.awt.LayoutManager]. Aceste clase descriu modul în care elementele se așează într-un '''Container'''. Cele mai importante sunt: | O altă serie de clase necesară pentru implementarea unei interfețe grafice este setul de clase care extind interfața [http://docs.oracle.com/javase/7/docs/api/java/awt/LayoutManager.html java.awt.LayoutManager]. Aceste clase descriu modul în care elementele se așează într-un '''Container'''. Cele mai importante sunt: | ||
Another series of classes required for implementing a GUI is the set of classes implementing interface [http://docs.oracle.com/javase/7/docs/api/java/awt/LayoutManager.html java.awt.LayoutManager]. These classes describe how elements are placed in a container. Some of them are: | |||
==== [http://docs.oracle.com/javase/7/docs/api/java/awt/FlowLayout.html java.awt.FlowLayout] ==== | ==== [http://docs.oracle.com/javase/7/docs/api/java/awt/FlowLayout.html java.awt.FlowLayout] ==== | ||
'''FlowLayout''' | '''FlowLayout''' is used to place elements horizontally, until they don't fit anymore, in which case, subsequent components are placed on the next line. This is the simplest type of layout. | ||
==== [http://docs.oracle.com/javase/7/docs/api/java/awt/GridLayout.html java.awt.GridLayout] ==== | ==== [http://docs.oracle.com/javase/7/docs/api/java/awt/GridLayout.html java.awt.GridLayout] ==== | ||
'''GridLayout''' | '''GridLayout''' is used to place components in a matrix with configurable size. | ||
==== [http://docs.oracle.com/javase/7/docs/api/java/awt/BorderLayout.html java.awt.BorderLayout] ==== | ==== [http://docs.oracle.com/javase/7/docs/api/java/awt/BorderLayout.html java.awt.BorderLayout] ==== | ||
'''BorderLayout''' | '''BorderLayout''' is used to place elements along the four borders and in center: NORTH, SOUTH, EAST, WEST and CENTER. Only one element can be placed in either of the five positions. | ||
==== [http://docs.oracle.com/javase/7/docs/api/java/awt/CardLayout.html java.awt.CardLayout] ==== | ==== [http://docs.oracle.com/javase/7/docs/api/java/awt/CardLayout.html java.awt.CardLayout] ==== | ||
'''CardLayout''' | '''CardLayout''' is used to add more components to a container, from which only one is visible at any given time. This type of layout is useful to generate wizard type applications in which the user skips from one screen to the next and back by using ''Next'' and ''Previous'' buttons. | ||
More about layouts in the [http://docs.oracle.com/javase/tutorial/uiswing/layout/visual.html Oracle tutorial]. | |||
=== Event Handlers === | === Event Handlers === | ||
Every '''JComponent''' supports a list of events which it is sensitive to. To each event, an action can be associated which is executed when that event is triggered. For example, then a button is pressed, or when the mouse moves over the component, or when something is typed in a text component, etc. These handlers are, in fact, methods, defined in certain interfaces. These methods are executed in parallel with the main program, as threads, in the moment when the event is triggered. Methods that add a handled to a component look like this: | |||
* ''public void addActionListener(ActionListener _listener)'' - | * ''public void addActionListener(ActionListener _listener)'' - for ''action'' type events, meaning activating a component (like click on a button, writing a text in a text field, etc.); | ||
* ''public void addMouseListener(MouseListener _listener)'' - | * ''public void addMouseListener(MouseListener _listener)'' - for events related to the mouse; | ||
* etc. | * etc. | ||
The same handler can be associated to multiple elements, in which case, in order to know which element triggered the event, the method ''getSource()'' is used, defined in class '''java.util.EventObject''' which is the superclass for all objects received as arguments by handler methods ([http://docs.oracle.com/javase/7/docs/api/java/awt/event/ActionEvent.html java.awt.event.ActionEvent], [http://docs.oracle.com/javase/7/docs/api/java/awt/event/MouseEvent.html java.awt.event.MouseEvent], etc.). Method ''getSource()'' returns a reference of type Object to the component that generated the event. | |||
More about handlers in the [http://docs.oracle.com/javase/tutorial/uiswing/events/index.html Oracle tutorial]. | |||
=== | === Example === | ||
We will write a '''JFrame''' that contains two'''JLabel''', two '''JTextField''', one '''JTextArea''' and one '''JButton'''. When the button is pressed, the two text fields will be loaded with the dimensions of the frame and an 'x' character will be appended to the text area: | |||
<syntaxhighlight lang="java"> | <syntaxhighlight lang="java"> | ||
| Linia 162: | Linia 165: | ||
</syntaxhighlight> | </syntaxhighlight> | ||
The GUI appears like that: | |||
[[Fișier:testframe.png| | [[Fișier:testframe.png|The execution result of the code above]] | ||
To create more complex frames, you need use other types of '''LayoutManager''' classes, elements of type [http://docs.oracle.com/javase/7/docs/api/javax/swing/JScrollPane.html javax.swing.JScrollPane], or, you can use an integrated developing environment (IDE) like [http://netbeans.org/kb/docs/java/quickstart.html Netbeans] to visually create the interface. | |||
<!-- | |||
== JavaFX == | == JavaFX == | ||
| Linia 401: | Linia 405: | ||
Pentru JavaFX există o aplicație care permite dezvoltarea vizuală de interfețe grafice, numită [http://www.oracle.com/technetwork/java/javafx/tools/index.html JavaFX Scene Builder]. | Pentru JavaFX există o aplicație care permite dezvoltarea vizuală de interfețe grafice, numită [http://www.oracle.com/technetwork/java/javafx/tools/index.html JavaFX Scene Builder]. | ||
--> | |||
Versiunea curentă din 5 decembrie 2015 01:59
In many of the applications that you will develop in Java, you will also need an adequate graphical interface: windows, buttons, edit fields, checkboxes, etc. There are several libraries used for developing graphical interfaces, the most popular being Java Swing and the most recent being JavaFX.
Java Swing
The package that contains the majority of classes for Swing applications is java.swing, some other other classes are used from the older package java.awt. The main container class for GUI elements is javax.swing.JFrame.
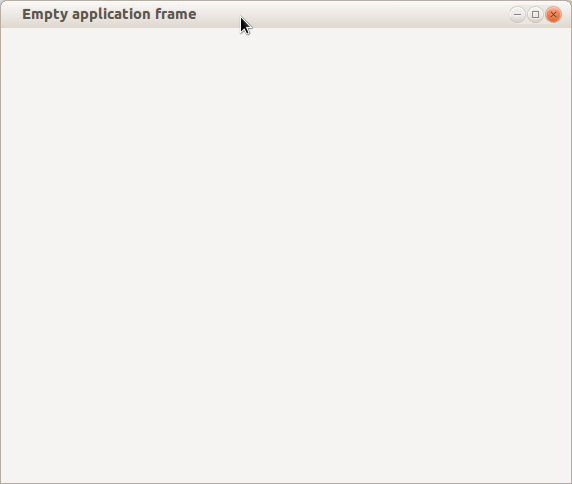
The Frame is the main window of the GUI. It's the element associated with the horizontal bar containing the icon, application name and the three buttons minimize, maximize and close:
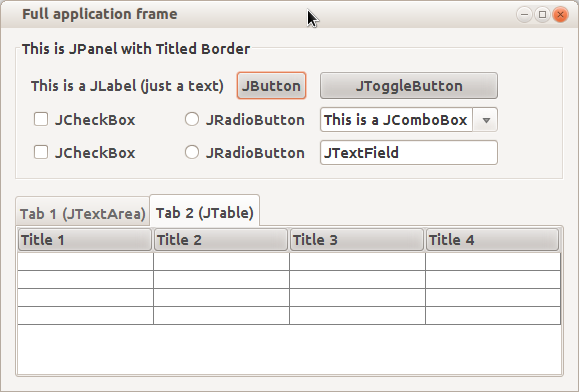
This is a JFrame containing the most used elements in Swing:
Components
All Swing objects, with the exception of class JFrame, inherit class javax.swing.JComponent which in turn inherits (indirectly) class java.awt.Container. So, there is a hierarchy of components, each element called parent containing other sub-components called children. Next, we'll present the elements required for task 6. For a more detailed description, read the Oracle tutorial.
javax.swing.JPanel
JPanel is a generic container that can hold other elements. It can be visible, changing the background color, the image model or having a border, or be invisible, only used for the hierarchy of the content. It is recommended not to place elements directly in a JFrame, but in a JPanel that is placed in a JFrame. This is particularly useful when reusing a panel.
javax.swing.JLabel
JLabel is a component used to display text or image in a container.
javax.swing.JButton
JButton is, as the name says, a button. This can have either a text or an image displayed on top. It's used by specifying an event handler of type ActionListener (see #Event Handlers) which is triggered when the button is clicked.
javax.swing.JTextField
JTextField is an area where a short text can be entered, on a single line. This too can have an associated event handler of type ActionListener which is triggered when Enter is pressed when the text field is focused.
javax.swing.JTextArea
JTextArea is a component where you can add a large text on more than one line.
Layouts
O altă serie de clase necesară pentru implementarea unei interfețe grafice este setul de clase care extind interfața java.awt.LayoutManager. Aceste clase descriu modul în care elementele se așează într-un Container. Cele mai importante sunt:
Another series of classes required for implementing a GUI is the set of classes implementing interface java.awt.LayoutManager. These classes describe how elements are placed in a container. Some of them are:
java.awt.FlowLayout
FlowLayout is used to place elements horizontally, until they don't fit anymore, in which case, subsequent components are placed on the next line. This is the simplest type of layout.
java.awt.GridLayout
GridLayout is used to place components in a matrix with configurable size.
java.awt.BorderLayout
BorderLayout is used to place elements along the four borders and in center: NORTH, SOUTH, EAST, WEST and CENTER. Only one element can be placed in either of the five positions.
java.awt.CardLayout
CardLayout is used to add more components to a container, from which only one is visible at any given time. This type of layout is useful to generate wizard type applications in which the user skips from one screen to the next and back by using Next and Previous buttons.
More about layouts in the Oracle tutorial.
Event Handlers
Every JComponent supports a list of events which it is sensitive to. To each event, an action can be associated which is executed when that event is triggered. For example, then a button is pressed, or when the mouse moves over the component, or when something is typed in a text component, etc. These handlers are, in fact, methods, defined in certain interfaces. These methods are executed in parallel with the main program, as threads, in the moment when the event is triggered. Methods that add a handled to a component look like this:
- public void addActionListener(ActionListener _listener) - for action type events, meaning activating a component (like click on a button, writing a text in a text field, etc.);
- public void addMouseListener(MouseListener _listener) - for events related to the mouse;
- etc.
The same handler can be associated to multiple elements, in which case, in order to know which element triggered the event, the method getSource() is used, defined in class java.util.EventObject which is the superclass for all objects received as arguments by handler methods (java.awt.event.ActionEvent, java.awt.event.MouseEvent, etc.). Method getSource() returns a reference of type Object to the component that generated the event.
More about handlers in the Oracle tutorial.
Example
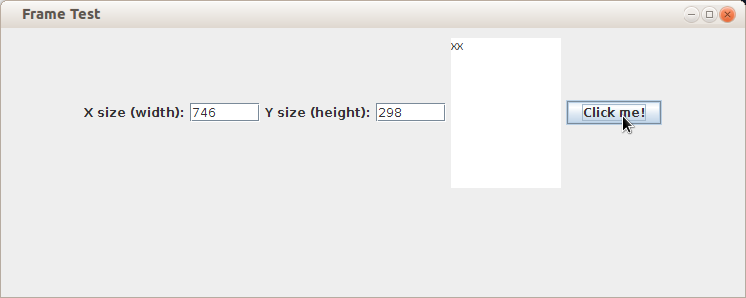
We will write a JFrame that contains twoJLabel, two JTextField, one JTextArea and one JButton. When the button is pressed, the two text fields will be loaded with the dimensions of the frame and an 'x' character will be appended to the text area:
import java.awt.FlowLayout;
import java.awt.event.ActionEvent;
import java.awt.event.ActionListener;
import javax.swing.JButton;
import javax.swing.JFrame;
import javax.swing.JLabel;
import javax.swing.JPanel;
import javax.swing.JTextArea;
import javax.swing.JTextField;

public class FrameTest extends JFrame implements ActionListener {

    // we define the elements used in
    // the frame
    private JPanel mainPanel;
    private JLabel xLabel;
    private JLabel yLabel;
    private JTextField xField;
    private JTextField yField;
    private JTextArea textArea;
    private JButton button;

public FrameTest(String _title){
    // calling the constructor for JFrame to set the title
    super(_title);

    // initializing the components (method is implemented below)
    initComponents();

    // calling pack() defined in superclass to resize the frame according to
    // contents
    pack();

    // displaying the frame
    setVisible(true);

    // select the default behaviour when closing the frame by clicking
    // the X button on the bar: the application will exit
    setDefaultCloseOperation(EXIT_ON_CLOSE);
}

public static void main(String[] _args){
    FrameTest _frame = new FrameTest("Frame Test");
}

private void initComponents() {
    // setting the layout as FlowLayout
    setLayout(new FlowLayout());

    // creating the components

    // the panel adds the components in
    // a FlowLayout
    mainPanel = new JPanel(new FlowLayout());
    xLabel = new JLabel("X size (width):");
    yLabel = new JLabel("Y size (height):");
    xField = new JTextField(6); //6 columns (characters)
    yField = new JTextField(6); //6 columns (characters)
    textArea = new JTextArea(10, 10); //10 columns, 10 rows
    button = new JButton("Click me!");


    //adding components to panel
    mainPanel.add(xLabel);
    mainPanel.add(xField);
    mainPanel.add(yLabel);
    mainPanel.add(yField);
    mainPanel.add(textArea);
    mainPanel.add(button);

    //adding scrollPane to frame
    add(mainPanel);

    // adding the listener to the button Component
    button.addActionListener(this);
}

// this is the handler defined in the ActionListener interface
public void actionPerformed(ActionEvent _actionEvent) {
    xField.setText(String.valueOf(this.getWidth()));
    yField.setText(String.valueOf(this.getHeight()));
    textArea.append("x");
}

}
The GUI appears like that:
To create more complex frames, you need use other types of LayoutManager classes, elements of type javax.swing.JScrollPane, or, you can use an integrated developing environment (IDE) like Netbeans to visually create the interface.


