OOP Lab Task 6: Diferență între versiuni
De la WikiLabs
Jump to navigationJump to search
| Linia 40: | Linia 40: | ||
#* In order to display the frame, call the parent class method <code style="color:green;">setVisible</code> with the proper argument set. | #* In order to display the frame, call the parent class method <code style="color:green;">setVisible</code> with the proper argument set. | ||
#* Your frame is ready to be displayed. You need only to explicitly instantiate a '''Client''' object. | #* Your frame is ready to be displayed. You need only to explicitly instantiate a '''Client''' object. | ||
# Add to '''Client''' class the '''main''' method, | # Add to '''Client''' class the '''main''' method, and put a single statement inside, the instantiation of a '''Client''' object. Run the class and you will see a window like the one shown above. | ||
# Cosmeticize the GUI class as follows: | |||
#* declare the '''JtextArea''' and '''JTextField''' references as instance fields, so that they are accesible outside the constructor in this class. You will need them to couple the ClientPeer to user interface. | |||
#* display your name as the title of your frame. To do that, call somwhere inside the constructor the parent method <code style="color:green;">setTitle</code> with your name as an argument. Run the file and see the window being displayed with your name on the left top part of the frame. | |||
#* Make your name an instance variable, so that it may be used by the ClientPeer to format the messages. Modify the constructor to accept the name as an argument and to initialize the name instance field. | |||
#* call somewhere in the constructor the parent method <code style="color:green;">setDefaultCloseOperation</code> whose argument tells the object what to do if the frame window is closed. We want the client application to end (so that it not remain active after the GUI interface dissapers, wasting computer resourses and needing the OS intervention to be killed). The argument value that defines this behavior is the constant value <code style="color:green;">EXIT_ON_CLOSE</code> inherited from the parent class. | |||
# It's time to add functionality to the GUI: | |||
== Submitting == | == Submitting == | ||
Versiunea de la data 12 ianuarie 2016 23:33
Required Tutorials
- The Object Oriented Paradigm; Classes and Objects
- Notions About the Java Language
- Writing and Executing a Java Program
- Java Syntax; A Program's Lexical Structure
- Coding Conventions
- Advanced Notions About Object Oriented Programming
- Java Application Programming Interface (API) (EN)
- Exception Handling
- Input/Output Streams
- Serialization
- Network Sockets
- Concurrent Programming - Threads
- Graphical User Interface (GUI) - Java Swing and JavaFX
Requirements
- Create a new project, named oop_lab6.
- For this task you need the previously designed classes Message, ClientPeer and Server, from OOP Lab Task 5. Copy their source .java files inside this package (letting NetBeans to refactor them or manually changing their package statement to make these classes part of this package).
- Modify the class Server so that its main method, instead of instantiating and running a ServerPeer object, instantiates a Client object. The Client arguments are a string (the name of the client on the server side) and the Socket reference, returned by the accept method called for the ServerSocket object.
- The class ClientPeer, which was used in the previous laboratory only to send messages, will manage a bidirectional connection, to send AND receive messages through it.
- Beside the ObjectOutputStream you need an input stream to read Message objects from. The following things need to be added to this class:
- a reference to an
ObjectInputStreamobject; - The ObjectInputStream is a filter stream that encloses the input stream of the socket. You get the reference to that input stream using the Socket's method
getInputStream. The filter stream will automatically deserialize the received Message objects. The input and output streams instantiations are done inside the constructor. - a method, named
readMessage, without arguments, that returns the formatted string of the received Message object. Inside this method you read a single object from the input stream, using the proper method of the ObjectInputStream object, downcast the read object to a Message type and call the proper method of the received object to get the formatted string. This method may throw various exceptions of type IOException when called, and also an exception of type ClassNotFoundException when the downcasting is not possible. These are checked exceptions; though you do not catch them they need to be declared by the method. - The close method needs now to close both streams, the input stream and the output stream.
- a reference to an
- Remember! All fields are private, all methods are public.
- Beside the ObjectOutputStream you need an input stream to read Message objects from. The following things need to be added to this class:
- The client will be enclosed in a graphical user interface (GUI) frame, with two areas, one for typing the messages to be sent, and another area that displays in real time all messages. A message is sent the moment you press the Enter key. Also, when Enter is pressed the write area is emptied and your message is shown as the last message in the display area. All messages, sent and received, are displayed as formatted strings name:message. Add to your package a class named
Client, that will manage the GUI frame and the ClientPeer. You may reuse the Client class from the previous package, but it needs to be thorougly modified, so it's better to create it from scratch. This class will be designed in two steps. First, you design the GUI frame. Then you will add the functionality, coupling the GUI frame to the ClientPeer object. The GUI frame to design is the following: 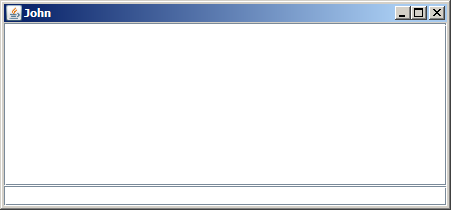
- The Client class extends the JFrame class from the javax.swing package. An object of JFrame type is a GUI frame, to be open as a separate window on your screen. The frame itself, with its three upper right buttons, is drawn automatically by the JFrame object on the screen upon JFrame instantiation. You need to design only the content of the framed window (the so called content pane), and all this may be done inside the constructor of the Client class, so that the frame is fully drawn upon its instantiation.
- The content pane for the Client has two parts, the display area and the typing area. These areas will be handled by two objects, that you instantiate as follows:
- a
JTextAreaobject, instantiated with two arguments, the number of lines and the length of a line in number of characters. Instantiate the display area to have 10 lines with 40 characters per line. - a
JTextFieldobject, instantiated with one argument, the length of the line in number of characters;
- a
- Each graphical object needs to be added to the content pane, calling the
addmethod of the JFrame class. The content pane has a default layout with 5 regions, one central region and four side regions (this default layout is managed by an object of type BorderLayout). The add method allows you to put a graphical object in any of these five regions. It may accept a single argument, a reference to a graphical object, in which case that graphical object will fill the central region. An overloaded version of the add allows a second argument that specifies the region where the graphical object is to be put. For this project:- put the text area object in the center area;
- put the text field object in the bottom area. This place is explicitly specified as constant argument value
BorderLayout.SOUTH. This constant is defined in a class that's part of the java.awt package, so you need to import it too.
- The order of this additions is irrelevant, as long as they are in different regions, but be sure that you add a previously instantiated graphical object.
- If you do not want the frame size to be explicitly defined, but you want it to adapt to the specified dimensions of the text area and text field, call the method
pack, inherited from the parent JFrame class. - In order to display the frame, call the parent class method
setVisiblewith the proper argument set. - Your frame is ready to be displayed. You need only to explicitly instantiate a Client object.
- The content pane for the Client has two parts, the display area and the typing area. These areas will be handled by two objects, that you instantiate as follows:
- Add to Client class the main method, and put a single statement inside, the instantiation of a Client object. Run the class and you will see a window like the one shown above.
- Cosmeticize the GUI class as follows:
- declare the JtextArea and JTextField references as instance fields, so that they are accesible outside the constructor in this class. You will need them to couple the ClientPeer to user interface.
- display your name as the title of your frame. To do that, call somwhere inside the constructor the parent method
setTitlewith your name as an argument. Run the file and see the window being displayed with your name on the left top part of the frame. - Make your name an instance variable, so that it may be used by the ClientPeer to format the messages. Modify the constructor to accept the name as an argument and to initialize the name instance field.
- call somewhere in the constructor the parent method
setDefaultCloseOperationwhose argument tells the object what to do if the frame window is closed. We want the client application to end (so that it not remain active after the GUI interface dissapers, wasting computer resourses and needing the OS intervention to be killed). The argument value that defines this behavior is the constant valueEXIT_ON_CLOSEinherited from the parent class.
- It's time to add functionality to the GUI:

Submitting
- The assignment will be evaluated automatically by the Web-CAT platform.
- You could access the Web-CAT platform using the username and the password with which you acces the electronica.curs.pub.ro intranet.
- Select the OOP Lab Task 6 assignment.
- Submit your work as a single .zip archive (give it whatever name you choose) containing only the Java source code files.
- Attention Any deviation from these instructions may lead to the loss of the entire amount of points.